The final measurements:

After the rough 25% enlargement and then the extra overall length, this is what I've come up with. This results in a bag deep enough for an average load of stuff with straps that are long enough to go over your shoulder. My paper pattern is a quarter inch smaller here and there, but I simplified things a little for this diagram.

I can fit a wallet, checkbook, pack of tissues, sunglass case, tape measure, pen, and a bag of cosmetics with space left over. If I had a mobile phone, I'm sure that would fit in there too!
Regarding the half yards of fabric, yes, this can be done, but remember, rather than cutting two pieces out of each fabric on the fold, you'll be cutting four pieces out of each fabric and sewing extra seams up the sides.

See the extra seam that runs along the side and up the length of the handles? I'm perfectly fine with how it looks, but I will warn you that it got a little bulky down at the bottom corners when I used the corduroy. Just something to keep in mind.
Also, the half yard thing won't work if you have a directional fabric. I got away with it on this bag, even though the fabric had a direction, because I thought it looked fine either way. Here's what your layout will look like.
Oh, and for what it's worth, I didn't add any extra width for seam allowances when I used four pieces instead of two. It doesn't make much difference.
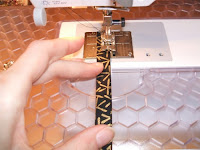
Now, onto the button loop. To make that, I used a two by seven inch rectangle, ironed it lengthwise into quarters, and sewed up the long edge. Don't worry about the short ends, they are sewn into the seam.
Then I sewed across the point so it stays all nice and crisp and flat and pointy.


Then you just insert the loop between the main fabric and the lining, and it gets sewn right into the top seam. That picture was shows it all lined up and ready to insert. There's no mystery about where to put it, because you just line it up with the front seams. Whether you want the folded under part facing up or down is up to you. I've done it both ways.


This is actually bag #2 I made from this fabric. Here's #1. And you want to know a little piece of trivia? If you have one yard of fabric, you don't have to do the extra seams on both bags. You can do one the traditional way with the pieces on the folds and one the squeezy way with the extra seams.

Okay, I have thought about this WAY too much. You're probably all wishing I'd make a skirt or something! Bye for now!
.jpg)


3 comments:
Love it Love it Love it! You've done it again! (I'm a total bag girl, myself!) I'll never get bored with this! Thanks for the tutorial!
You're welcome, MJ. I fear I may be turning into a bag girl as well. Sigh.
Hi, I just wanted to let you know I posted a link to your pattern on my blog. http://knitnatak.blogspot.com/2011/04/tokyo-tie-bag.html
Thanks for the tutorial!
Post a Comment